Here's just a brief look...
I was working my regular job at a tanning salon and once fall semester ended I got a seasonal job at Michael Kors. Well now that my seasonal job ended around early January I wanted another second job, so I am now currently employed at Victoria's Secret which is exciting for me! I also went on a vacation to Lake Havasu City, AZ with my family for a couple of days to just relax and get away from reality. Its now almost the start of my spring semester at college so I'm now back to reality.
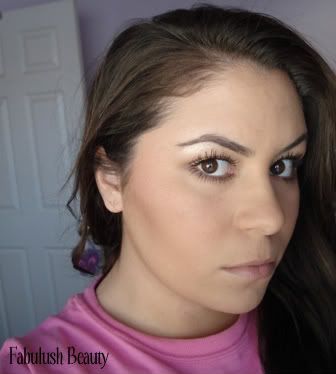
For this entry I want to do a post on the makeup (the focus is my eyes) I did for New Year's Eve.
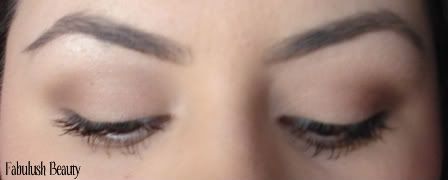
Eyes

All the makeup used is by MAC unless specified
lids
Soft Ochre (primer)
I apply this all the way up to my brows
*when applying pigment make sure the primer is slightly wet so pigment will stay on lids
Softwash Grey & Silver Fog Pigments (5 Cool Thrillseekers Tartan Tale)
I mixed the two pigments to create this color
crease
To The Ball & Heather Belles (6 Beauties Eye Palette Tartan Tale)
Black Tied
Carbon
brow bone
Wedge
I used this color to soften the colors I used in my crease
Shroom
eyebrows
Lingering Eyebrow Pencil

eyelash curler
Shu Uemura
mascara
Colossal (Maybelline New york)
eyeliner
Smolder
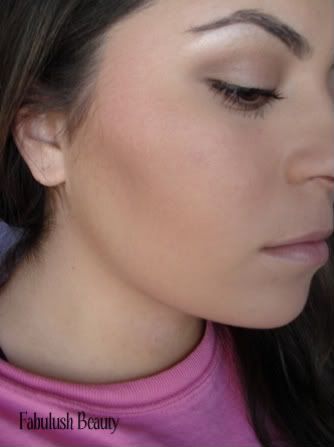
Face/Final Look

Pro Longwear Foundation NC30
Sheer Pressed Powder NC35
Studio Fix Concealer NW25
Medium Dark MSF
Applied to my jawbone to contour my face
Hoola (Benefit)
I used this matte bronzer in the hollow of my cheeks to contour
Dallas (Benefit)
I applied lightly on the apple of my cheeks so the look wouldn't be to harsh
Step by Step Process
I went backwards with this look just because pigments tend to fall on top of your cheeks
*if pigment does fall, use a baby wipe or makeup wipe to remove before applying foundation
- Apply eyelid primer
- Mix pigments then apply
- Apply crease colors then blend with Wedge (brow bone color)
- Line eyebrows with Lingering & use eyelash spool to blend into brows
- Apply shroom lightly underneath brows
- Apply foundation, then concealer (undereyes and where necessary); last but not least Sheer Pressed Powder to set face makeup
- Blend Black Tied, Carbon and Heather Belles underneath your bottom lashes to create that smokey effect
- Add a little bit of silver pigment underneath your bottom lashes from your tear duct to the other half of your eyes and blend with the smokey colors
- Curl lashes and then apply mascara (I usually curl one side then apply mascara and continue with the next eye)
- Apply eyeliner to your bottom and top waterline of both eyes
- Use hoola cautiously to contour the hollow of your cheeks so you can get a more narrow looking face; since my face is round this helps tremedously! (*too much hoola and you'll create a dirty look versus a soft, appealing look)
- Apply Dallas lightly to apples of your cheeks and blend towards your temples
- I like using Medium Dark MSF on my jawbone so I can contour my face (I like this versus Hoola because its not as dark so it looks more natural, plus you won't get a harsh line)
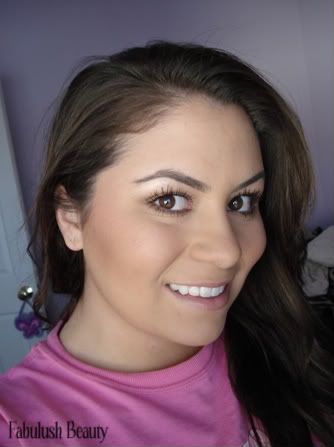
- I don't have anything but Nivea chapstick on the last picture but I did apply Lancome Juicy Gelee Crystal Clear Lip Gloss so my face didn't look overdone
I hope everyone enjoys this post!
Sneak Peek...
I just bought the Mia Clarisonic & the Makeup Optional Kit by Philosophy so my next post will be all about this.